Dig it! A Swimming Pool


A swimming pool is certain to add interest to your layout

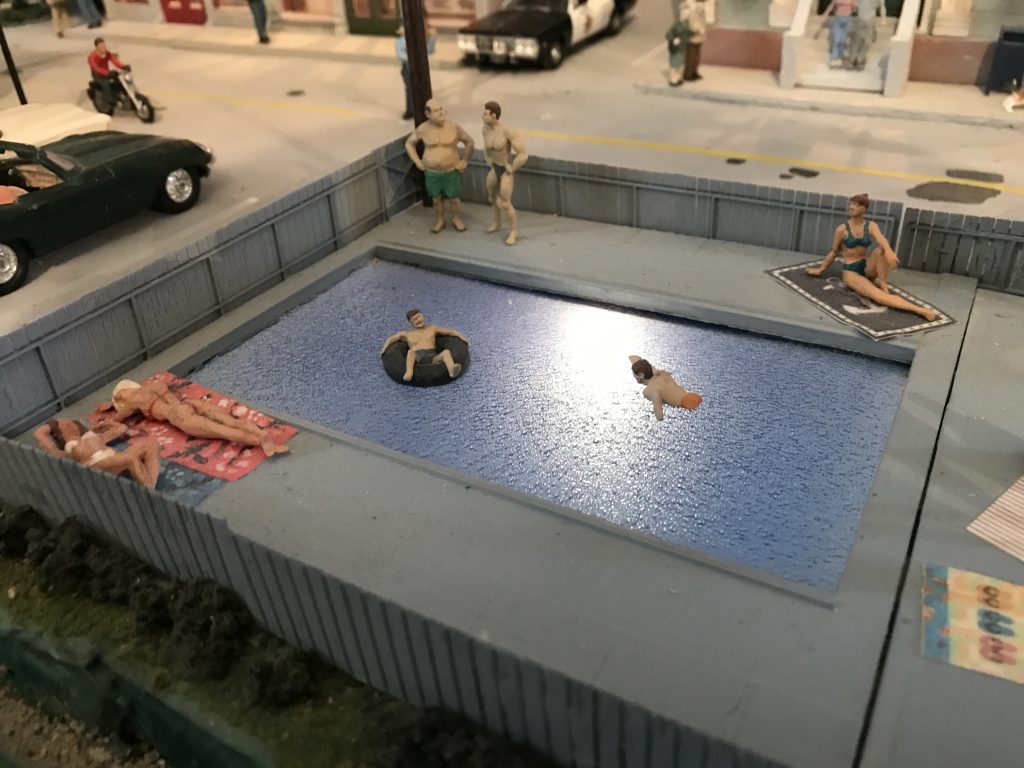
A swimming pool is not something you see on every layout. Lighted from below, it attracts your attention immediately, and it is so unique that I gave it a central location on my layout. The people you see in the water are 1:48 scale white metal figures by Arttista. The people standing around the pool are1:43 scale by Preiser. But you really don’t have to build a large community pool to use this technique. This method can be used for a backyard pool, a fountain or any small body of clean water.

Time and Difficulty

This swimming pool is easy to make, but will probably take a couple of days to construct.

What You’ll Need

  • foam core board
  • hot melt glue
  • a sheet of blue translucent acrylic, slightly textured
  • a small white LED or light bulb
  • heavy card stock
  • poolside figures
  • poolside graphics

Build a Box

For the pool structure, cut a rectangular pool deck to the dimensions of your overall pool area (pool opening and surrounding pavement) from foam core board., My deck is 6″ x 9″. Cut an opening in the pool deck the size of your pool. My pool is 4″ x 6″ (a scale 16′ x 24′). Cover the entire opening of the pool deck with the blue plastic sheet. Cut four pool walls, and construct an open box that will fit within the dimensions of the pool deck opening. In the center of the back wall, make a small hole for the bulb. Place the pool deck on the layout board and mark the dimensions. Cut a hole in your layout board slightly larger than your box dimensions and glue the box inside. Alternately, you can glue the box underneath your pool deck and fit it inside the hole., with accurate measuring and cutting, you can glue the foam core box flush inside the pool deck opening. Hot glue holds well and you only have to tack it; the foam core is not very heavy. You don’t have to worry about small gaps, you can cover the foam core deck with an optional heavy card stock “deck pavement”.

Pave the Pool Area

Cut heavy card stock to make the pavement around your pool. Cut an inner opening the size of your pool. I would make a the outer dimension a minimum of four feet (one inch scale) for a home walkway or up to six feet (3/4″ scale) for a commercial/public pool. Twelve feet (3″ scale) makes a good-sized area for sunning. For finishing details, you can add figures, a cooler, beach towel graphics, a fence, and wooden decking. Then pour yourself a PiƱa Colada and enjoy your new pool.

divider

Build a Split-Rail Fence


split rail fence
The split rail is one of the oldest and simplest of fences

Split-rail fencing is one of the oldest and simplest fences to build. It was very prevalent in the 1800’s along farmlands to keep animals contained. Years later, the rustic beauty was used for home landscaping. Today, you kind find split-rail fencing in parks, campgrounds and historic sites.

The rails of the fence were split from the trunk of a tree and cut to length, usually 8 feet. The split rails were laid on top of each other at a little more than a 90 degree angle. The rails alternated back and forth for stability and no posts were required. Because the bottom rails lay directly on the ground, no holes had to be dug, The fence was quick to put up, especially in rocky terrain where digging post holes was out of the question. however this also meant the fences did not usually last long.

Time and Difficulty

The goal of this project is to build a simple historic and decorative fence. The project is super easy and takes less than a day.

What You’ll Need

  • long fireplace matches or similar sized wood
  • hobby saw or knife
  • aging wash (see instructions)
  • tacky glue

Building the Fence

To build split rail fences in O scale, long fireplace matches are the way to go. Simply cut the heads off and cut them into scale six-foot or eight-foot pieces. The more imperfections the matchsticks have, the better the final product will look. You can leave them natural color for new fences. For older fences, scrape a serrated hobby saw along the face of the stick to texture the surface, then paint with a traditional grey ink wash, or with a weathering product I recommend: Age-It Easy liquid wash.

Grey Ink Wash

Make a grey ink wash by diluting india ink or black acrylic paint with water and a drop of dish washing detergent or isopropyl alcohol. Stain each stick individually before stacking and gluing. The weathering wash will not penetrate most glues.

Here is a good article by Harold Minkwitz on weathering wood on the Pacific Coast Air Line Model Railway.

Build It

Stack the sticks with between a forty-five and a ninety degree angle between rails, using a drop of tacky glue to secure them. For older fences, you may break a rail or two, have some rails fallen over, or even glue foliage climbing over the neglected rails.

So there you go, good friend. A super simple method for building historic fences on your layout.