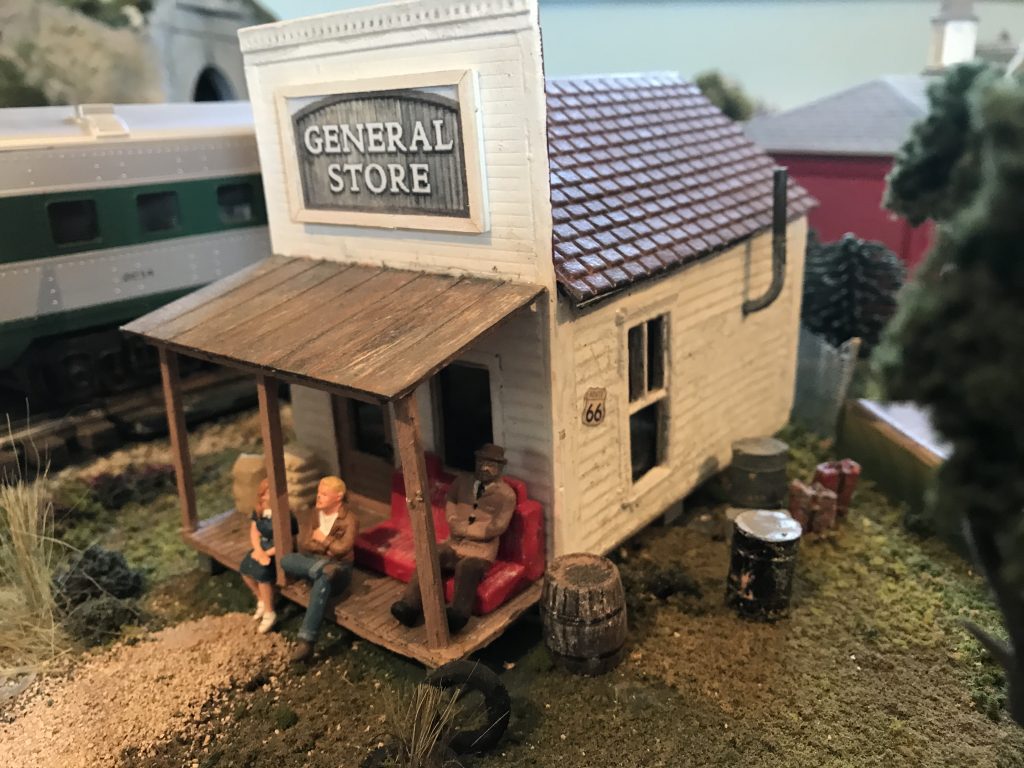
Every small community once had a General Merchandise Store. But the store doesn’t have to be big. This little store could also work as a small office: a land surveyor, a lawyer, a barber, a dentist, a post office. it’s adaptable to many uses, and the small size allows you to place it just about anywhere on you layout. Mine sits on the property just outside a curve bringing interest to what could be an easily overlooked corner of the layout.
Time and Difficulty
The goal is to build an versatile, small office that is suitable to fill any leftover space on your layout that needs attention. This project will take some moderate building skills and probably more than one day to finish.
What You’ll Need
- Styrene sheet or foam core board
- heavy card stock
- optional: scraps of balsa or basswood for the pillars
- clapboard texture sheet
- metal roof or shingles textured sheet
- carpenter glue
- rubber cement
- clear sheet acrylic or acetate
- small craft or popsicle sticks
- entry door
- one small window
- Optional: a second small window and or or door
- Interior graphics and accessories
Cut Out the Floor, Walls and Roof
Cut a scale 12′ x 20′ floor out of heavy card stock and cut the walls and roof out of sheet styrene or foam core board. Cut the openings for doors and windows.
Construct a Base Frame
Build a wooden frame from the craft or popsicle sticks. The width of the sticks in unimportant, but the height should be between 1/8″ and 1/4″ (6 to12 scale inches). This will be the height of the sill plate and to me, less looks better.
<picture>
Glue the card stock flooring on to the base frame with a thin coat of carpenter glue. You want the flooring to be card stock so it doesn’t add much height. Glue any flooring graphic or material onto the card stock with rubber cement. Coat both the card stock flooring and the back of the flooring graphic or material with cement and let it dry. Once it’s dry, you can rub off any glue that got any where it shouldn’t be. Once both sides are dry, you get one shot at sticking them together, so be careful. The benefit of using rubber cement is that it will not curl paper products like white glue does.
Glue craft or popsicle sticks flush along the top edge of the side and back walls. This will give the roof support when it is added later. You may also want to glue a similar piece along one side wall of each wall to strengthen the corners, but that is up to you. Cover the exterior walls with clapboard material and the roof pieces with roofing material. Connect the two roof pieces at the top with a ‘paper hinge’ glued along the top edge of each of the roof pieces. The paper hinge will hold the roof pieces tightly together, but allow them to fit over the apex of the rear wall.
<picture>
Glue the door and window frames into the openings. Now is the time to paint your building. I recommend a white acrylic or white chalk paint works really well. NOTE: If you use chalk paint, NEVER wash your brushes out in the sink; chalk paint will clog the drain pipes. Glue any interior graphics you are using to the walls using rubber cement. Glue the clear plastic to the window frames using Testor’s Clear Cement and Window Maker. Testor’s clear will not craze the plastic and remains clear. Glue the four walls together and let them dry. Glue the roof on top, add external signage and you’re done!
