Window mullions are so small, you would think them difficult to model. But using a technique credited to Tim Fairweather and Mike Chandwell, they can be modeled quite easily. You can watch Chandwell’s YoutTube video here.
Time and Difficulty
The goal of this project is to simplify the modeling of tiny window mullions. This project can be completed in a few hours, depending how many windows you decide to make. It requires moderate cutting skill with a straight edge and razor or scalpel.
What You’ll Need
- Inexpensive label sheets
- computer with drawing program (optional)
- a printer (optional)
- Clear acetate plastic (can come from a blister pack)
- razor or scalpel
- steel straight edge
Printing the Labels
Draw the windows full-scale with mullions about 3mm wide. Print the mullions in white or on a colored paper, and print the glass part in black or a contrasting color. Print them on full-size self-adhesive label paper. Inexpensive labels work better, premium labels tend to adhere too well.
Cut out one or two widows at a time from the label paper and press them on the clear plastic. Use a straight edge to guide your cuts, Cut along the outsides of each mullion using a straight edge to guide your blade. Cut fully from side to side, and top to bottom. don’t worry about the intersection of mullions, just cut through as if the crossing mullion weren’t there. Cut lightly using a sharp blade. Try to cut completely through the label paper without cutting through the clear plastic.
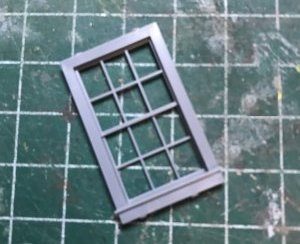
The Magic
Once all the mullions are cut out, use the knife point to lift the corner of the dark boxes, leaving the mullions firmly attached to the plastic. Trim the plastic to the window size and finish with a frame.