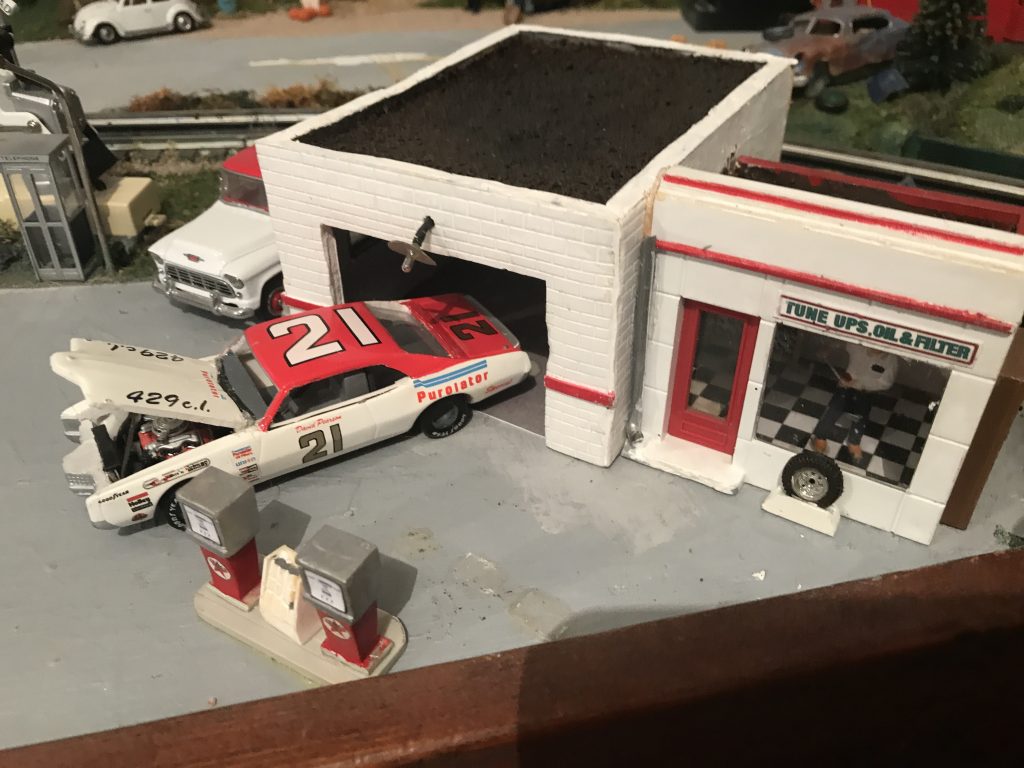
The Bachmann Brothers plastic company began producing the O-scale Plasticville small gas station in 1950. Its initial production spanned the years 1950-1954 and it was reissued again in 1967. The assembled structure measured 8 ¼” long x 2X ½” deep and 2 ¾” high. That’s a scale depth of 10 feet. A typical American automobile is 14 ½ feet long and the average single car garage is 12′ x 22′, so you can see that the small Plasticville gas station is severely under-sized. In fact, a scale car or truck is about 4 ¾ inches long; 2 ¼ inches longer than the bay. Additionally, the station’s bay doors are too narrow and the roof to low to look real. This article tells how I remedied those problems.
Time and Difficulty
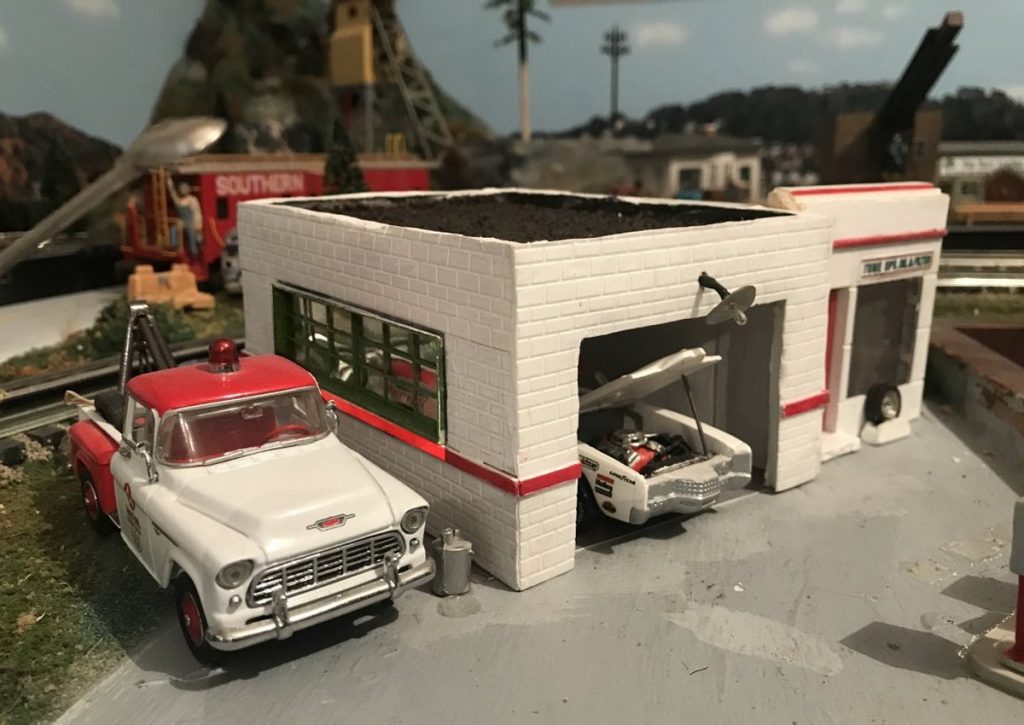
The goal of this modification is to make the garage bay large enough to accommodate a 1:43 – 1:48 scale car or truck and give the station a more realistic appearance overall. This project will take moderate model building skills and a day or more to complete.
What You’ll Need
- A Plasticville small Gas Station
- a hobby or razor saw
- a ruler
- a jeweler’s file
- 1/8″ thick foam-core poster board (10″ x 10″min)
- razor or hobby knife
- white or Carpenter’s glue
- Tacky Glue (see recommendation)
- hot glue gun and glue sticks
- Styrene sheet with concrete block texture (see sources)
- Clear Plastic sheet (can be cut from discarded blister packs)
- Grandt Line 18-pane Factory window (optional)
- strip styrene, 4″ scale width
- clean fine sand
- aluminum foil, cut to 2 x 3 inches
- 18 volt GE-1813 incandescent bulb and socket or L.E.D.
- 18 volt grain-of-wheat bulb and shade
- printed graphics (see link at the end of this post)
- resin-cast detail items
- white chalk paint
- glossy enamel paint in your station’s color
- light grey or tan flat acrylic paint
Building Modification
Begin by cutting the front wall of the gas station apart between the entrance door and the first bay door. Be sure to cut all the way through the wall as vintage Plasticville material is usually quite brittle and does not snap cleanly like modern styrene.
Measure from the outside wall to your cut. Carefully transfer the measurement to the roof and rear wall sections and cut them as well. Set aside the office walls and the short section of roof to reassemble the office. You could potentially use the front and rear walls of the garage section and just cut new side walls and roof, but I decided to cut an entirely new garage bay from foam core board.
After cutting the front wall, you will find the name “Plasticville” is split between the two sections. Take a jeweler’s file and remove the raised letters “Plasticville” from above the door on the front wall.
Build A New Bay from Foam Core
To construct a new scale 17′ x 22′ scale bay for the station, cut the following pieces from a sheet of 1/8″ foam-core posterbord:
- Two 4 ½” x 2 ½” panels for the front and rear wall
- Two 5 ½” x 2 ½” panels for the side walls
- One 4 ½” x 5 ½” roof panel

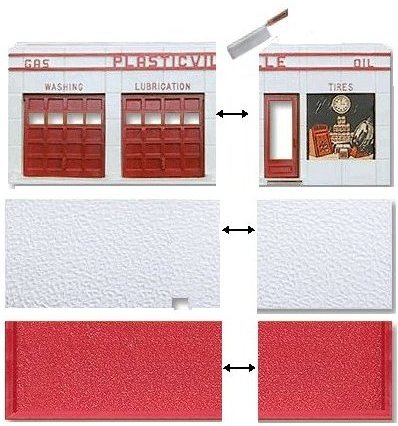
Use Tacky glue to attach sheets of textured Evergreen Styrene to the wall panels. Trim to fit. Use Tacky glue or hot glue to assemble the four wall panels together to make a box 4 ½” x 5 ½” box 2 ½” high. I painted the block walls a chalky white. Cut an opening for a Grandt Line Factory Window in the side wall of the garage. If you do not have a Grandt Line window, you can cut a donor window from a Plasticville airport hangar or a Plasticville Bank. Again, be sure to cut all the way through as Plasticville material is brittle and will not snap cleanly like modern styrene.
Glue a scale 4″ band of strip styrene horizontally about one-third the way up the wall as a construction detail. Paint it with a glossy paint. I painted it a contrasting glossy red. Recess the roof section about 1/8″ from the top of the box, and glue it into place. Cover the roof top with white glue and sift on a layer of fine sand to resemble roofing gravel. When it dries, paint it with light grey or tan acrylic paint to both color it and seal it down. Hint: do not use black or dark grey for the roof; it should appear sun-faded.
Modify the Bay Doors
The stock red Plasticville garage doors are too narrow for O scale, so use a razor saw to trim the edges and join the two garage doors into a single, wider door. Glue a strip of styrene across the back side of the joint to reinforce the junction and keep it straight.
Reconstruct the Office
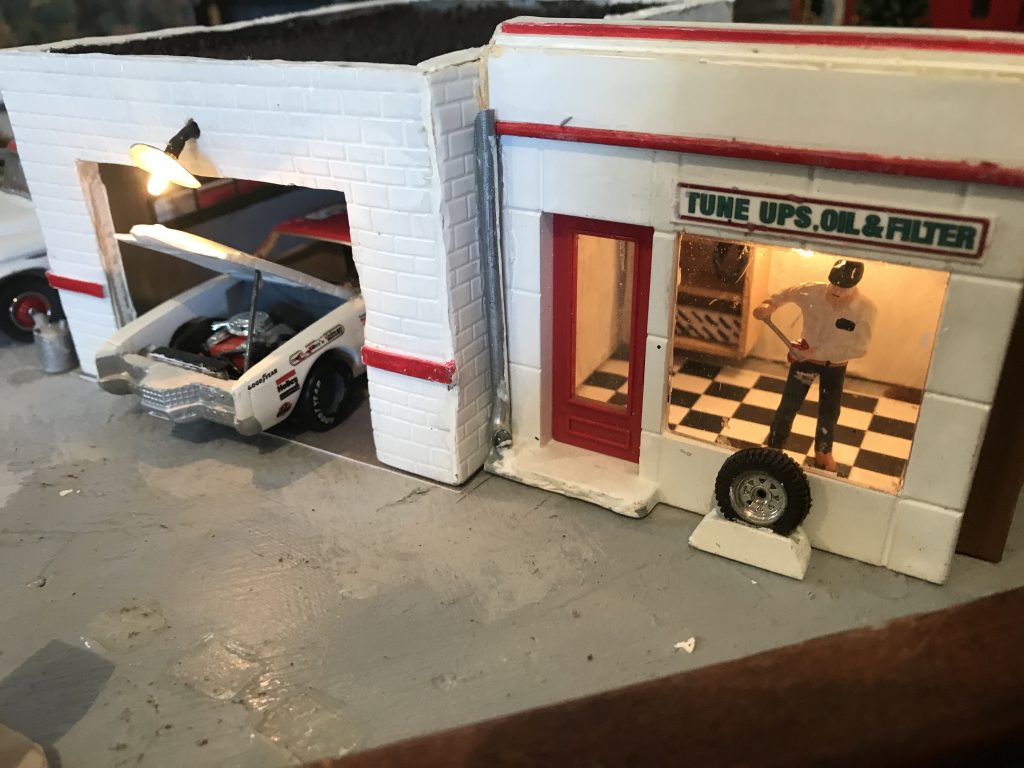
Turning your attention back to the office, file off the window tabs that hold the cardboard window insert. Use Tacky glue to glue together a frame of 4″ scale strip styrene and glue a piece of clear plastic to the inside of the opening. Glue another piece of clear plastic to the inside of the door opening. Use Tacky glue to cover the inside roof portion with the aluminum foil. This will help distribute the interior lighting later. Print the graphics sheet (see the link at the end of this post).

Cut out the interior wall graphics and glue to the side and rear walls. The sheet includes wall calendars, signage, and both a wooden floor and a tile floor graphic for you to choose from. When everything is dry, glue the office together with hot glue.Paint the office with chalky white and a gloss color to match the bay.
Cut a large hole in the side wall of the foam core garage bay where the office will attach. This is to let light into the bay. Attach the office to the garage bay section with hot glue.
Lighting
Here you have a choice of lighting. I used a single GE-1813 type, 18 volt incandescent bulb in a bayonet base to light the interior. I hot-glued the bulb base on the ceiling between the office and the bay so the lamp would light both interiors. Alternatively, you could use two white LEDs with a current limiting resistor (see my article on lighting with LEDs).
Drill a small hole in the front bay wall directly over the center of the door opening and fish the wires of a grain-of-wheat bulb with shade through to the inside. Again, you could use a super-white LED for this. (A super-white will throw a spot of light on the ground in front of the station). Solder or tape the leads to the wires that connect in parallel to the GE-1813 bulb, or other LEDs, and run the wires for both lamps down the inside corner of the back wall. Secure with hot glue. You can leave the wires bare for the connection, but I recommend you build an electrical junction instead.
Add Finishing Touches
I painted the layout base where the garage bay would sit a concrete grey and dripped some blackish-brown wash on for oil stains. I glued the checkerboard graphic to the base where the office would sit. In front, I placed a surplus tire from a model kit mounted in a frame built using scraps of styrene. I glued a resin-cast tool cabinet (of unknown manufacture) to the side of the office. I reused the Plasticville oil cans, but scratch-built modern fuel pumps. I glued pump graphics to the face of the pumps. I added resin castings of oil drums, boxes and tires to the back, and added foliage and weeds to complete the station transformation.
The Graphics for this Project
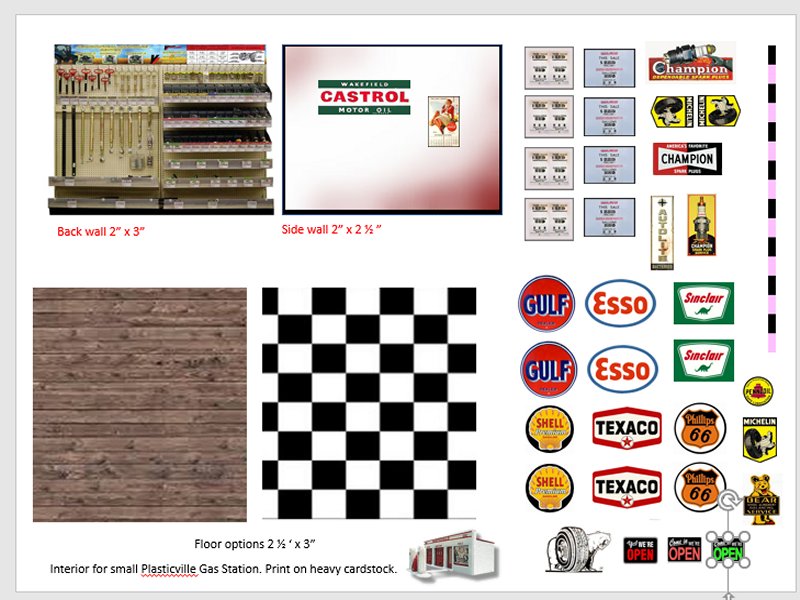
This PDF File includes all the graphics used in this project.